OpenGraph images with Astro and i18n
As you could see by pasting this post link on twitter, this blog is multilingual and the OpenGraph images are different for each language. This is a great feature to have in a multilingual blog, as it allows you to have a more personalized experience for your readers.
However, while I was setting this up, I found that the documentation or examples about it were terrible, maybe because of this projects set up, beign Astro + i18n. So I decided to write this post to help others who might be struggling with this (and my future self, of course). You can see the final result by watching the github repository of this blog
Prerequisites
-
An astro project(duh) -
React plugin for Astro -
Satori, serve, sharp and gray-matter -
Satori: Converts React components to SVG images.
-
Sharp: Image processing library for converting SVG to PNG.
-
Gray-Matter: Parses front-matter from markdown files.
I got you
npm install satori sharp gray-matter
We’ll use React only for the OpenGraph images, so if you don’t have it yet, you can add it by running:
npx astro add react
I will be working with markdown files for the blog posts.
What are we going to do?
Using a React component, we will render images for each one of our posts at build time. It’s very customizable since you can use any font and background image you want.
Setting up your project
For this post, I will assume you have a basic understanding of Astro and i18n. If you don’t, I recommend you to check the Astro documentation and the i18n documentation
First, you will need to set i18n in your project. You can do this by following the steps in the i18n documentation.
You wil need to update the astro.config.mjs and add the site information. This is required for later, trust me.
// astro.config.mjs
export default defineConfig({
site:
process.env.NODE_ENV === "development"
  ? "http://localhost:4321"
  : "https://davidhuertas.dev",
integrations: [tailwind(), react()]
});
and also the package.json file. We’ll cover what’s going on here later in the post.
  "scripts": {
    ...
    "build": "npm run build-setup && astro build && npm run kill-assets",
    "build-setup": "npm run serve-assets & npm run wait-for-assets",
    "serve-assets": "serve -p 3001 --no-port-switching ./src/images",
    "wait-for-assets": "wait-on -t 5000 http://localhost:3001/opengraph/background.png",
    "kill-assets": "kill-port 3001 || true"
    ...
  },
Reestructure of the content of your blog
Now, we will need to make a few changes in our project folder structure.
First, we will create a folder called content, with the subfolder posts.
Inside posts we will create a folder for each language we want to support. In my case, I have two languages: English and Spanish. So I have the following folder structure:
src/
  content/
    posts/
      en/
        og-images-with-astro-and-i18n.md # This post
      es/
        og-images-con-astro-e-i18n.md
    pages/
    config.ts # Collections definition
    ...
If you followed the Astro tutorial for i18n, you should have a structure similar to this one for the pages folder.
src/
  pages/
      en/
        index.astro
      es/
        index.astro
       index.astro
    ...
We will update it so it looks like this:
Note: The
og.png.tsfile is the file that generates the og image for the post.
src/
  pages/
      [...lang]/posts/[...post]/
        [...slug].astro
        og.png.ts
    ...
      en/
        index.astro
      es/
        index.astro
       index.astro
    ...
Prepare the OpenGraph image template
The OpenGraph image will require a background image and some font for the text. We will create a folder called opengraph inside the pages folder. Inside this folder, we will create a folder called fonts and a background image.
Inside images, we will create a blog folder with a hero image for each blog post.
The background image needs to be 1920x1080 pixels.
The fonts can be anything, I will use Inter, but you can use any font you like. You can get the fonts here
src/
  pages/
    images/
        blog/  #Folder for each blog post Hero Image
          hero-vps.png
          react-logo.png
          ...
        opengraph/
          fonts/ #Fonts for the OpenGraph image
          background.png #Background image for the OpenGraph image
          ...
Create an OG.tsx file inside the components/OpenGraph folder. This file will be the template for the OpenGraph image.
export default function OG(
  title: string = 'David Huertas - Software Engineer',
  heroImageURL: string
) {
  const basePath = 'http://localhost:3001/'
  const backgroundImageURL = `${basePath}opengraph/background.png`
  return (
    <div
      style={{
        display: 'flex',
        flexDirection: 'row',
        width: '100%',
        height: '100%',
        backgroundImage: `url(${backgroundImageURL})`,
        backgroundSize: 'cover',
        backgroundPosition: 'left',
        backgroundRepeat: 'no-repeat',
        alignItems: 'center',
        position: 'relative'
      }}
    >
      <h1
        style={{
          display: 'flex',
          flexDirection: 'column',
          flex: '1',
          padding: '2rem 4rem',
          fontSize: '4rem',
          textOverflow: 'ellipsis',
          overflow: 'hidden',
          fontWeight: 'bold',
          color: 'black',
          fontFamily: 'Inter',
          wordBreak: 'break-word'
        }}
      >
        {title}
      </h1>
      <div
        style={{
          display: 'flex',
          flexDirection: 'column',
          flex: '1',
          margin: '2.5rem'
        }}
      >
        <img
          src={`${basePath}blog/${heroImageURL}`}
          style={{
            width: '100%',
            height: '100%',
            objectFit: 'cover',
            borderRadius: '24px'
          }}
        />
      </div>
    </div>
  )
}
Add a createImage.ts file inside the same folder. This file will convert the React component to an SVG image and then to a PNG image.
import fs from 'fs/promises'
import satori from 'satori'
import sharp from 'sharp'

export async function SVG(component: JSX.Element) {
  return await satori(component, {
    width: 1200,
    height: 630,
    fonts: [
      {
        name: 'Inter',
        data: await fs.readFile(
          './src/images/opengraph/fonts/Inter-Regular.ttf' //You can use any font you like.
        ),
        weight: 400
      },
      {
        name: 'Inter',
        data: await fs.readFile(
          './src/images/opengraph/fonts/Inter-ExtraBold.ttf'
        ),
        weight: 800
      }
    ]
  })
}

export async function PNG(component: JSX.Element) {
  return await sharp(Buffer.from(await SVG(component)))
    .png()
    .toBuffer()
}
Creating the OpenGraph image
Let’s have this .md for example
---
title: 'Deploy docker containers in VPS with Github Actions'
pubDate: 2024-07-18
language: en
description: 'How to make a CI/CD pipeline to deploy Docker containers in a VPS with Github Actions'
author: 'Kuro'
heroImage: ../../../images/blog/hero-vps.png
tags: ['VPS', 'Docker', 'Github Actions','CI/CD']
layout: ../../../layouts/PostLayout.astro
draft: false
---
It’s important to have all the params defined in src/content/config.ts file.
import { defineCollection, z } from 'astro:content'

const postCollection = defineCollection({
  schema: ({ image }) =>
    z.object({
      title: z.string(),
      description: z.string(),
      pubDate: z.date(),
      draft: z.boolean(),
      tags: z.array(z.string()),
      language: z.string(),
      heroImage: image().refine((img) => img.width >= 1080, {
        message: 'Cover image must be at least 1080 pixels wide!'
      })
    })
})

export const collections = {
  posts: postCollection,
}
Now, we will create the og.png.ts file inside the [...lang]/posts/[...post] folder. This file will generate the OpenGraph image for the post.:
This is my file, adapt it to your needs.
import type { APIRoute, InferGetStaticPropsType } from 'astro'

import OG from '../../../../components/OpenGraph/OG'
import { PNG } from '../../../../components/OpenGraph/createImage'
import fs from 'fs/promises'
import { getCollection } from 'astro:content'
import matter from 'gray-matter'

export async function getStaticPaths() {
  const blog = await getCollection('posts')
  const blogData = await getBlogFrontmatterCollection()
  return blog.map((post) => {
    const postData = blogData.find((data) => data.title === post.data.title)
    return {
      params: {
        lang: post.slug.split('/').shift(),
        post: post.slug.split('/').pop()
      },
      props: {
        title: post.data.title,
        heroImage: postData?.heroImage?.replace('../../../images/blog/', '')
      }
    }
  })
}

type Props = InferGetStaticPropsType<typeof getStaticPaths>

export const GET: APIRoute = async function get({ props, params }) {
  const { title, heroImage } = props as Props
  const png = await PNG(OG(title, heroImage))
  return new Response(png, {
    headers: {
      'Content-Type': 'image/png'
    }
  })
}

const getBlogFrontmatterCollection = async () => {
  const contentDirs = ['src/content/posts/en', 'src/content/posts/es']
  const getFrontmatter = async (dir: string) => {
    const files = await fs.readdir(dir)
    return Promise.all(
      files
        .filter((file) => file.endsWith('.md'))
        .map(async (file) => {
          const content = await fs.readFile(`${dir}/${file}`, 'utf-8')
          return matter(content).data
        })
    )
  }

  const frontmatterPromises = contentDirs.map(getFrontmatter)
  const frontmatterCollections = await Promise.all(frontmatterPromises)

  return frontmatterCollections.flat()
}
Now you should be able to build your project. With the custom script, the image files will be generated at runtime and will be served locally.
Using the OpenGraph image in your blog post
Create a Head.astro component in the components` folder.
---
interface Props {
  title: string
  description: string
}
const { title, description } = Astro.props as Props
const permalink = new URL(Astro.url.pathname, Astro.site).href //See? I told you we would need this
const ogImageURL = permalink + '/og.png'
---

<head>
  <!-- Primary Meta Tags -->
  <title>{title}</title>
  <meta name='title' content={title} />
  <meta name='description' content={description} />

  <!-- The rest of your head content -->

  <!-- Open Graph / Facebook -->
  <meta property='og:type' content='website' />
  <meta property='og:url' content={permalink} />
  <meta property='og:title' content={title} />
  <meta property='og:description' content={description} />
  <meta property='og:image' content={ogImageURL} />

  <!-- Twitter -->
  <meta property='twitter:card' content='summary_large_image' />
  <meta property='twitter:url' content={permalink} />
  <meta property='twitter:title' content={title} />
  <meta property='twitter:description' content={description} />
  <meta property='twitter:image' content={ogImageURL} />
</head>
I have a PostLayout.astro file that I use for the layout of the blog posts so I can easely import the Head component and pass the title and description to it.
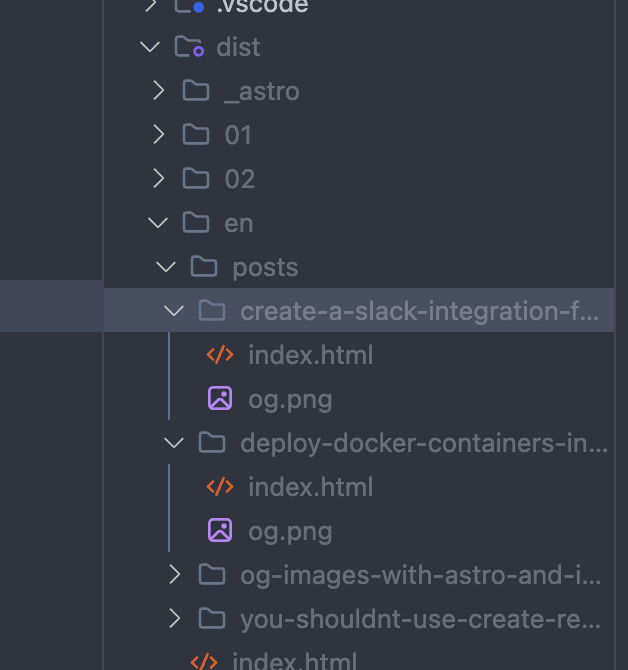
With this configuration, at buildtime the OpenGraph image will be saved with each post
Enjoy your new OpenGraph images
Thats it! Now you have a personalized OpenGraph image for each blog post in your multilingual blog. This will help you to have a better SEO and a more personalized experience for your readers.
As you can see, the configuration is a bit complex, but it’s worth it. If you have any questions, feel free to ask me in twitter about it.
Remember that you can see the final result by watching the github repository of this blog